HubSpot Native integration to Trustmary
Note: You'll need the HubSpot Workflows feature to set up this integration.
In this article we guide you through the steps needed to connect Trustmary with HubSpot via our native integration. The guide consists of a set of simple steps with screencaptures to make the integration process as easy as possible for you.
Integrating HubSpot to Trustmary opens up possibilities to for example include the NPS gathered with Trustmary to your HubSpot contacts, or to automatically send out feedback surveys to certain HubSpot contacts.
Go to the HubSpot App Marketplace and install the Trustmary app
You can find the Trustmary app page in the Marketplace with the link here.
After clicking Install in the marketplace, you will be redirected to a page where you can select the account you want the app to be installed to.

Connect the Trustmary app to Hubspot
Select the account you wish to connect to. Note that you'll need to log in before this step, if you haven't already.
After selecting an account, click on Connect app to complete the installation.

Create a blank workflow in HubSpot
Next, navigate to Workflows in HubSpot and select Create Workflow. From the drop-down menu, select From scratch.
Select Contact-based and Blank workflow in the menu, and move to the next screen by clicking Next.

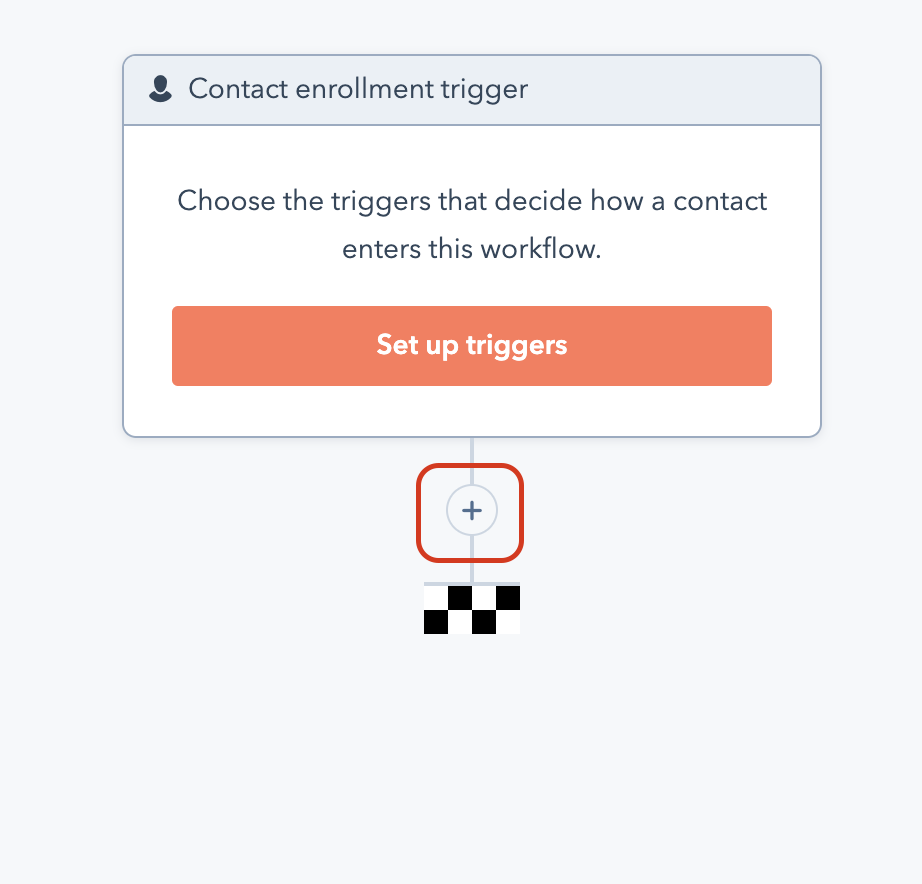
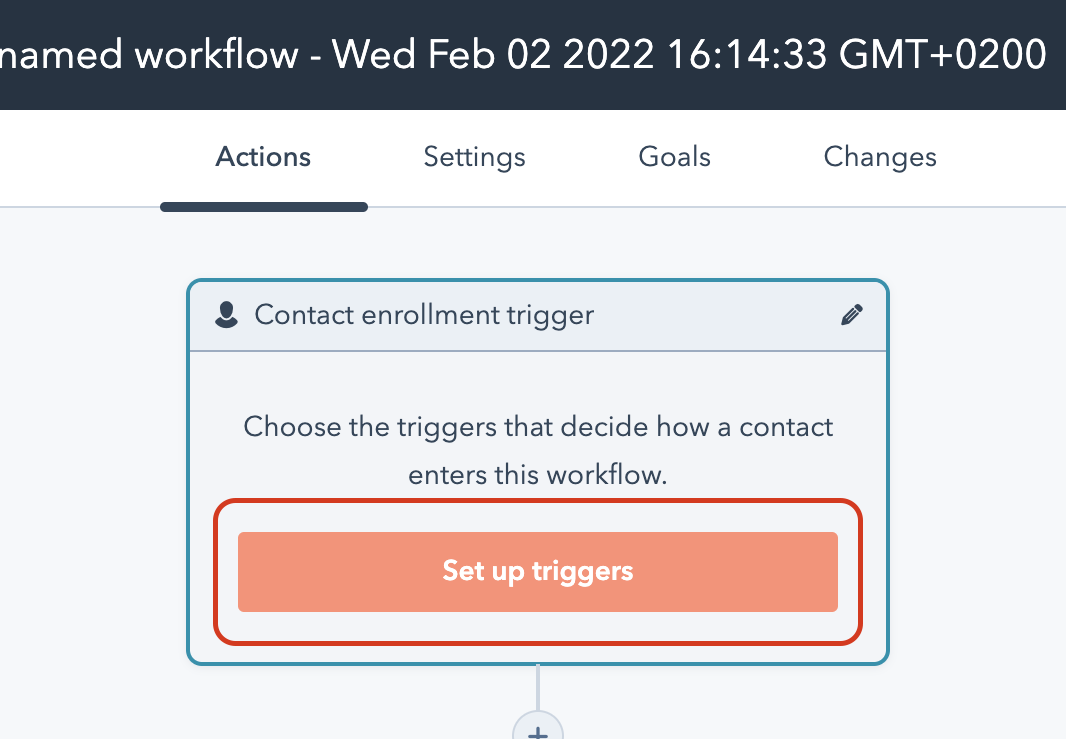
Add a step workflow
Click on the plus sign under the trigger section. No need to set up any triggers right now.

Find Connect to Trustmary

Retrieve the API key from Trustmary
Jump back to Trustmary, and navigate to the API & webhooks section from the navigation bar on the left.

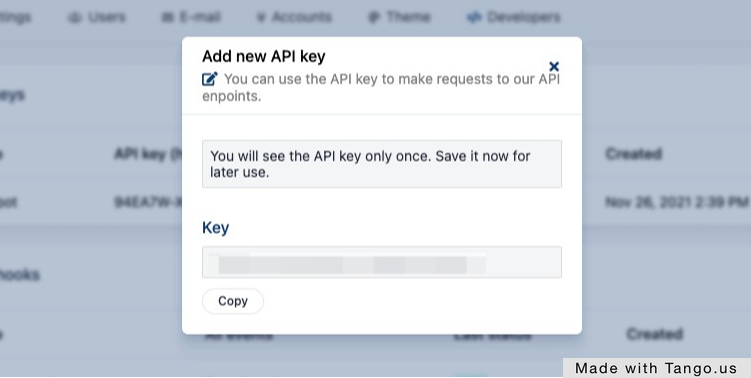
Add a new API key
Click the Add new button on the API keys section to add a new one.

Name, Save, and Copy the API key.
Click Save once you're ready to generate the API key. You will only see the key once, so make sure it is copied.
Insert the API key in HubSpot
Remember to click Save near the bottom when you're done.

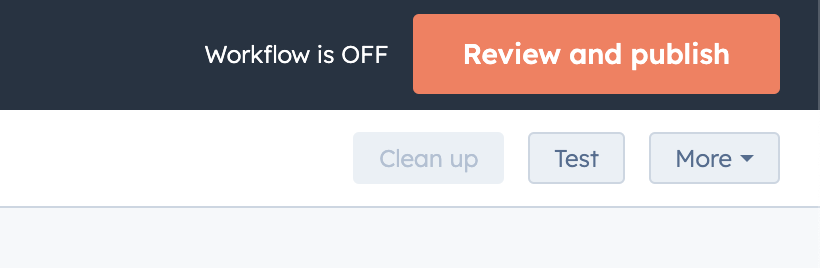
Review, publish and Turn on the workflow
From the top-right corner click on the Review and publish button. After that you can turn on the workflow by scrolling down, clicking Skip to turn on and clicking Turn on workflow.

Test the connection with a contact
Start by clicking Enroll in the top-right, under the On/Off toggle. Select Choose individual contacts, and search for a test contact. Finally click Enroll in the bottom of the drawer.

You can verify the enrollment by clicking the Details button in the workflow editor.
Map the survey questions that send data back to HubSpot
Note: You'll need to have a custom survey to use this feature.
This step is for moving data collected with your survey back to your HubSpot contacts' fields. You'll need to manually map the survey questions in Trustmary to HubSpot fields.
Open up the survey in Trustmary, and go to Survey settings, and then Advanced settings, where you'll find the HubSpot menu. You should now see the survey fields that can be plugged back into HubSpot when you receive answers. Click on each question drop-down, and select a suitable HubSpot property to which you would like to link the question data. Remember to click Save at the bottom after making changes.

Create a workflow for adding contacts to Trustmary
Start by creating a new workflow, similarly to the first one (check previous steps). Add a workflow step by clicking the plus icon.
Select and configure the action
Find Trustmary in the Choose an action menu. Select Add to a list in Trustmary, and select which list you'd like to use (note that you need to have lists created beforehand).
Then click Save on the bottom, and the step is configured.

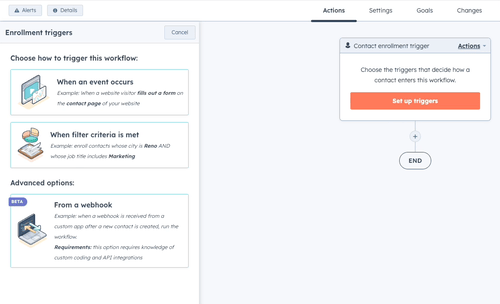
Set up the trigger(s)
Set up contact enrollment triggers for the workflow. These are the "rules" by which contacts are sent to Trustmary.
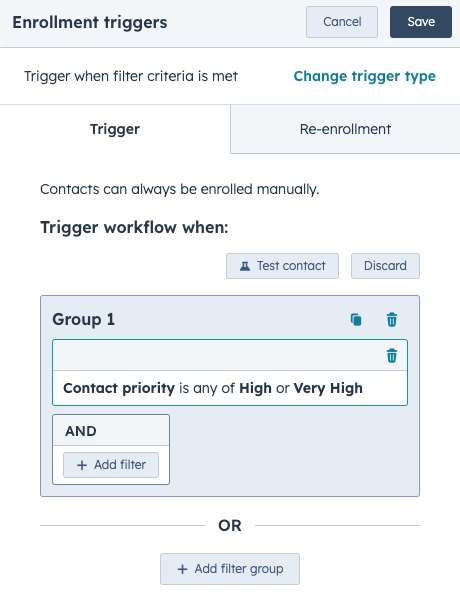
15.1 Specify the triggers you want to use
This step varies depending on your business case, but most can be done by selecting When filter criteria is met, and then adding filters for your use case (for example "Deal stage is won"). You can also add multiple conditions to the trigger with the AND/OR operators.
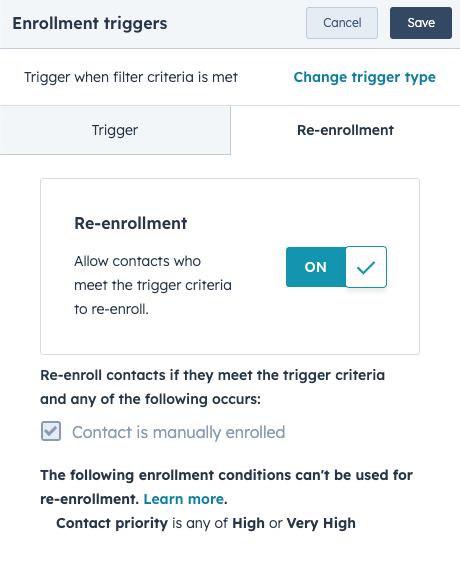
15.2 Choose if contacts can be re-enrolled
Click on the Re-enrollment tab, and check the box if you'd like contacts to be enrolled more than once. This can be handy if you for example get multiple purchases from the same customer.
After the conditions are done, click on Test contact to test the trigger. Note that you'll need a contact that actually meets the criteria you've chosen.
Note: the contact isn't sent to Trustmary when testing. The steps only verifies that your trigger works.
Review and turn on the workflow
Click on the Review and publish button in the top-right of the editor.
In the review screen, select whether you want to enroll existing contacts which meet the criteria too, or only new contacts which meet the criteria. If you select existing contacts, all the contacts that meet the set criteria will be sent to Trustmary.

After you've reviewed the workflow, click Skip to turn on, and then Turn on workflow to start it.

Push a contact to Trustmary manually
This is the final test of the integration to see it actually is set up correctly, and will send contacts to the selected list in Trustmary.
Click Enroll in the top-right corner like you did with the previous workflow. Select Manually enroll contacts, then Choose individual contacts, and search for a test contact. Finally click Enroll in the bottom of the drawer.
After this, check the contact arrived on the list in Trustmary.
Introduction
In this article we guide you through the steps needed to connect Trustmary with HubSpot via our native integration. The guide consists of a set of simple steps with screencaptures to make the integration process as easy as possible for you.
Integrating HubSpot to Trustmary opens up possibilities to for example include the NPS gathered with Trustmary to your HubSpot contacts, or to automatically send out feedback surveys to certain HubSpot contacts.
Step-by-step guide
Go to the HubSpot App Marketplace and install the Trustmary app
You can find the Trustmary app page in the Marketplace with the link here.
After clicking Install in the marketplace, you will be redirected to a page where you can select the account you want the app to be installed to.
Connect the Trustmary app to Hubspot
Select the account you wish to connect to. Note that you'll need to log in before this step, if you haven't already.
After selecting an account, click on Connect app to complete the installation.
Create a blank workflow in HubSpot
Next, navigate to Workflows in HubSpot and select Create Workflow. From the drop-down menu, select From scratch.
Select Contact-based and Blank workflow in the menu, and move to the next screen by clicking Next.
Add a step workflow
Click on the plus sign under the trigger section. No need to set up any triggers right now.
Find Connect to Trustmary
Retrieve the API key from Trustmary
Jump back to Trustmary, and navigate to the API & webhooks section from the navigation bar on the left.
Add a new API key
Click the Add new button on the API keys section to add a new one.
Name, Save, and Copy the API key.
Click Save once you're ready to generate the API key. You will only see the key once, so make sure it is copied.
Insert the API key in HubSpot
Remember to click Save near the bottom when you're done.
Review, publish and Turn on the workflow
From the top-right corner click on the Review and publish button. After that you can turn on the workflow by scrolling down, clicking Skip to turn on and clicking Turn on workflow.
Test the connection with a contact
Start by clicking Enroll in the top-right, under the On/Off toggle. Select Choose individual contacts, and search for a test contact. Finally click Enroll in the bottom of the drawer.
You can verify the enrollment by clicking the Details button in the workflow editor.
Map the survey questions that send data back to HubSpot
Note: You'll need to have a custom survey to use this feature.
This step is for moving data collected with your survey back to your HubSpot contacts' fields. You'll need to manually map the survey questions in Trustmary to HubSpot fields.
Open up the survey in Trustmary, and go to Survey settings, and then Advanced settings, where you'll find the HubSpot menu. You should now see the survey fields that can be plugged back into HubSpot when you receive answers. Click on each question drop-down, and select a suitable HubSpot property to which you would like to link the question data. Remember to click Save at the bottom after making changes.
Create a workflow for adding contacts to Trustmary
Start by creating a new workflow, similarly to the first one (check previous steps). Add a workflow step by clicking the plus icon.
Select and configure the action
Find Trustmary in the Choose an action menu. Select Add to a list in Trustmary, and select which list you'd like to use (note that you need to have lists created beforehand).
Then click Save on the bottom, and the step is configured.
Set up the trigger(s)
Set up contact enrollment triggers for the workflow. These are the "rules" by which contacts are sent to Trustmary.
15.1 Specify the triggers you want to use
This step varies depending on your business case, but most can be done by selecting When filter criteria is met, and then adding filters for your use case (for example "Deal stage is won"). You can also add multiple conditions to the trigger with the AND/OR operators.
15.2 Choose if contacts can be re-enrolled
Click on the Re-enrollment tab, and check the box if you'd like contacts to be enrolled more than once. This can be handy if you for example get multiple purchases from the same customer.
After the conditions are done, click on Test contact to test the trigger. Note that you'll need a contact that actually meets the criteria you've chosen.
Note: the contact isn't sent to Trustmary when testing. The steps only verifies that your trigger works.
Review and turn on the workflow
Click on the Review and publish button in the top-right of the editor.
In the review screen, select whether you want to enroll existing contacts which meet the criteria too, or only new contacts which meet the criteria. If you select existing contacts, all the contacts that meet the set criteria will be sent to Trustmary.
After you've reviewed the workflow, click Skip to turn on, and then Turn on workflow to start it.
Push a contact to Trustmary manually
This is the final test of the integration to see it actually is set up correctly, and will send contacts to the selected list in Trustmary.
Click Enroll in the top-right corner like you did with the previous workflow. Select Manually enroll contacts, then Choose individual contacts, and search for a test contact. Finally click Enroll in the bottom of the drawer.
After this, check the contact arrived on the list in Trustmary.
Updated on: 24/02/2025
Thank you!